Tags
FOOD 1
RSS Feed
Sat - Sep 01, 2007 : 11:33 pm
tired
html Images
I was goofing around with The Gimp and noticed it had a couple save as html options. I played around with them and settled on using the colorxhtml one.
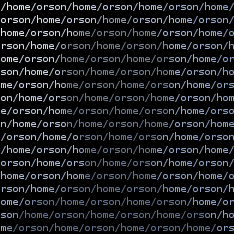
This is how I took this image and turned it into a cool text html thingy.
Before:

After:

The process goes like this:
Enjoy!
This is how I took this image and turned it into a cool text html thingy.
Before:

After:

The process goes like this:
- Open the image.
- Make sure the image is in the correct mode.
- Menu: Image>Mode>RGB
- Menu: Image>Flatten Image
- Get current size of image. (mine is 400x400)
- Determine the size you want it to appear on the screen. (about 235x235)
- Divide the height by 6 and the width by 13 (my 10px font is 6x13) to get the size you need to scale the image to. (39x18)
- Scale the image to that size in The Gimp
- Menu: Image>Scale Image
- Click the Chain/Link button next to height/width. (this "breaks" the link, so you can squish the image.)
- Set the height/width.
- Select Cubic Interpolation.
- Click Scale
- The image should look like it got pounded with a sledgehammer.
- Save it as colorxhtml
- Menu: File>Save As
- Enter name and location as normal.
- Select COLORXHTML as the file type.
- Click Save
- Select textfile
- Click the ... and pick a file to read. (this is the text that the image is created with.)
- Font: 10
- Separate CSS file: Yes
- Click Ok
- If you have vim you can reduce the file size some by opening the resulting html file and running the following search/replace several times until it doesn't find any more.
- %s/<span class="N\(......\)">\([^<]\+\)<\/span><span class="N\1">\([^<]\+\)<\/span>/<span class="N\1">\2\3<\/span>/g
- You can also reduce the css file by deleting the background lines and adding a line above the span.xxxxxx section.
- %s/background-color:black; //
- pre span { background-color:black; }
- You can combine the files by removing the link line in the html and replacing it with
<style type="text/css">
(contents of css file)
</style>
Enjoy!
Comment by Jason on Sep. 10, 2007 @ 09:09 pm
That's pretty cool. I love it when I learn new things about Gimp. I've been using it for years for designing simple sites (I'm a developer, not a designer, but I still enjoy and appreciate The Gimp)
Thanks for the how-to, Orson!
Thanks for the how-to, Orson!
